Day 1 – March 23rd 2018

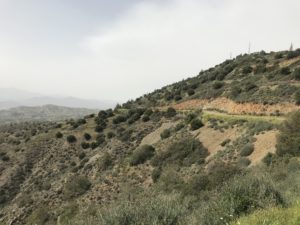
After driving around some to find a trail head with reasonably decent parking space, I finally started the hike from Aspradi along the road to Stradovuoni at 1:30PM.

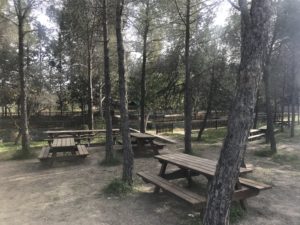
Going for approximately 1.5 hours, mostly on gravel yet some dirt roads and paved stretches, took me to Kornos picnic area where I could sit in the shade for a little while and refill my water bottles. So far I’ve used 3l already and I can tell that regular refills are going to be of vital importance for the success of this tour.
For the first time ever I go on a multi day hike in a faster state, bringing only water and pink Himalayan salt. My last meal was now over 21 hours ago and hydration is top priority.
I feel just slightly light headed, yet cannot tell if that’s caused by moving into mild hypoglycemia or by being in ketosis.
Actually the latter is more probable as I’ve been going on an unplanned OMAD, apart from my usual fat coffee in the morning (mixing 1tbsp each of coconut oil and butter into my first coffee)for the last two days anyway, just haven’t been hungry more than once a day.
This morning I also skipped the fat in the coffee and my last calorie intake was 6PM last night. I’m pretty amazed by my energy levels so far, and by my lack of hunger.
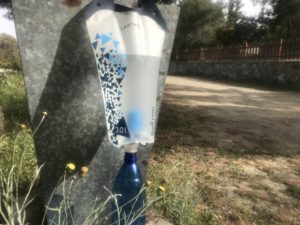
During this break I used my new water filter for the first time, I found it in a shop in Portland, Oregon, and it’s doing a fantastic job. You can’t really trust the tap water here on Cyprus and it’s a bliss to being independent from finding a store and by bottled water several times a day.
This island is pretty well equipped with public bathrooms and they all have running water. Wouldn’t use it without filtering it first, though!
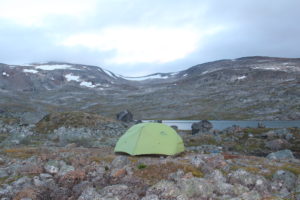
After 30min break I continued at 3:30 PM and hiked on until 6PM when I easily found a superb camp site right next to the dirt road I was following.
Most of the second part was also gravel and dirt roads, yet about 3.5km (2.2 miles) was paved road and pretty busy with traffic. Not so much fun…
The hiking was pretty soft and easy the whole afternoon and I’d guess I did around 18-19km (about 11 miles) total. I feel really good, still not hungry and energy is rather normal.
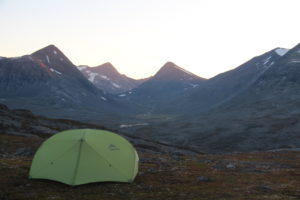
Pitched my tent right away as it gets dark here soon after the sun sets at 6, and I guess it’s gonna be an early night. Mostly due to lack of other options.
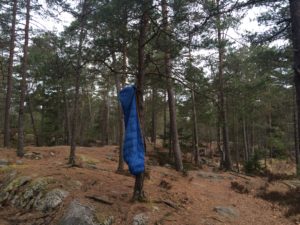
I’m trying out a new tent for the first time and so far it’s great. It’s a combination of traditional tent and hammock so tonight I use it on the ground for starter. Tomorrow I find some trees!

That’s all for now, thanks for checking out the post and I hope you found it valuable.
Please share if you did!
Peace // Claes

Personal equipment

So, finally I´d like to give You a list of what You need to pack for a longer hike of a few of more days and over night camping.
When it comes to Your personal gear I recommend to always get the best and lightest stuff that fits Your budget, especially if You want to stay away from mountain stations, cabins and other facilities as much as possible.
Naturally You´d need to pass by a cabin every now and then to wash Yourself and Your clothes, and maybe buy some provisions if You don´t want to carry everything from day one, yet the more remotely You want to roam, the more You need to be able to trust Your gear.

This is what You need to pack:

  • Backpack, 60-85l with rain cover – Make sure You´ve tried it on (packed) and that it fits Your back comfortably
  • Sleeping bag – make sure to check the average night temperatures of the region
  • Mattress – I recommend inflatable with or w/out down filling
  • Camping stove – make sure it´s light and You know how it works
  • Water filter (or cleansing tablets) unless You´re sure the water quality is ok
  • Tent – 3 seasons recommended, try to share a tent between 2-3 persons to save weight from Your packs
  • Knife – folded pocket knife is good
  • Cup or mug
  • Plate or bowl (eating directly out of the pot is a good option)
  • Spoon and/or fork (Plastic might break…)
  • Lighter or matches
  • Maps and compass (if You don´t know how to use them, learn it! Or get a GPS)
  • Personal care products
  • Basic first aid – bandages, any medication You use, Compeed (for covering and healing of blisters), insect repellents, etc.

Now, this is the bare minimum for hiking considerably safe and comfortable, personally I would not leave anything from that list behind.
Some people want to bring additional stuff to make the trip more comfortable, always remember that You need to carry everything in and out of the wild and make sure that You´re ok with the weight before adding to Your pack, ok?

Thank You so much for checking out my blog, please share this with friends and loved ones who might benefit or be interested!

By leaving Your name and email in the box below You get notification of futures posts and news!

Peace // Claes

Clothing

Hey, let´s just face it – most hikes are done in climate or surroundings that require some kind of clothing and the circumstances of Your hike will determine exactly what You need to wear.

Though many day hikes can be performed in just about any leisure pants and shirts, I definitely recommend to invest in some dedicated hiking clothes for any longer hike and also use them for day hikes as everyday garment has a tendency to wear and tear enormously fast when put to the test of nature!

This article is more of a checklist for You to pack the stuff needed for a medium to longer hike. Please observe that You might to add special equipment for a winter hike, or if You plan to cross glaciers etc, and that some stuff can be left out on a hike in guaranteed warm and dry climate.

So here´s the list:

  • Hiking trousers
  • Underwear, I recommend 3-4 pairs and wash them along the way
  • Socks, use liners and outer socks, 3-4 pairs each
  • T-shirts/shirts, 3-4
  • Long underwear, 1 set
  • Light fleece sweater
  • Warm wool, fleece or down sweater
  • Rain gear, jacket & trousers
  • Hat or cap
  • Gloves
  • Scarf or Buff
  • Light shoes for river crossing – I recommend Crocs as they dry very fast and double  well as camp slippers

Though I cannot recommend specific brands, due to variation in availability and the shear amount of producers, I would definitely ask You to get the most high end stuff that fits Your budget.
Outdoor clothing is normally very sturdy and, with the right care, serves You for years ot come unless You´re out in really rough conditions.
It´s definitely worth paying a little extra for the real quality stuff!

That said, I apply two principles myself to keep the costs down a bit (good equipment can be ridiculously pricy):

  1. Always shop new stuff before You need it (when You find it at a good price)
  2. Always go for the sales, buy summer stuff at the sale in fall and winter stuff in spring. You might not always get the “color of the season”, yet 30-70% off gives You a lot of bang for Your bucks

Planning You purchases can save quite a bit of money long term, and allow You to get quality that lasts and saves You even more. So don´t just go out there and buy everything at once, ok?

Thank You so much for checking out my blog, please share this with friends and loved ones who might benefit or be interested!

By leaving Your name and email in the box below You get notification of futures posts and news!

Peace // Claes

Tents

So, lets talk some about the “home away from home” – choosing the right tent is worth some thought, evaluation and due diligence as most people don’t want to acquire a bunch of different tents for different purposes. A good tent is quite and investment for most of us!

As we´re all about hiking on this blog I’m just presuming that weight matters to You as well, there’s not much fun carrying more than necessary (unless You feel the need to punish Yourself for something…). On the other hand there´s an inverse relationship between weight and price and, just as with other gear, the real light weight stuff can be ridiculously pricy.
One more thing to consider is the comfort of having a slightly larger, and therefore heavier, tent – especially on longer tours when it can be expected to get wet some of the days.
Personally I don’t mind using a 1-person tent for shorter tours while I definitely prefer a larger tent on my longer hikes, and even willingly carry an extra gear shed, that can be hooked on to my tent, when going out for two weeks or more. The comfort of never having to worry about wet gear inside the tent is totally worth the extra 900g (2lbs) in my pack.
Besides size, weight and price we have two basic models to consider:
  • Dome tents
  • Tunnel tents
Which to choose is basically up to Your preferences, though there are a few advantages to both models that might influence which one suits Your needs best.
Dome tents are self supporting, making them ideal for camping on surfaces where tent pegs are hard to use, like cliffs, very hard soil or sand. On the other hand they are mostly a little heavier than a tunnel tent of the same size and You can only sit upright close to the center. Most dome tents have two apses, providing the comfort of keeping backpacks on one side and using the other as entrance. They’re also ridiculously easy to pitch as You only need to insert the poles into the marked channels and fasten them, which all is rather self evident.
A tunnel tent need a little more ”getting used to” and I definitely recommend raising it a few times at home to make sure You know what goes where, I remember one year hiking with a friend who just bought a new tent and pitched it for the first time that first evening of the hike. I had my tent pitched, a pot of tea ready and was quite amused watching the struggle he went through getting all the lines in place and tightened.
Once You know what You’re doing, though, its all smooth sailing and the lower weight is an advantage on longer hikes (on weekend trips the weight doesn’t really matter that much as the pack is rather light anyway).
Please don’t expect me to recommend any particular brand here, as not all are available everywhere, and there are a ton of great tent manufacturers out there. Just let me say that if You want to be serious about You hiking and get really of the grid in regions where weather might get rough, You should definitely stay away from the lower end of the spectrum. There are some tents out there that are considerably less price than the high end stuff, and they might work excellently in the back yard or even in woodlands, yet there is a reason for the lower price and I would not risk saving on this important piece of gear if You wanna go into the mountains anywhere in the world.
I hope this article is helpful to you in choosing your equipment, please leave a comment and let me know, ok?

Thank You so much for checking out my blog, please share this with friends and loved ones who might benefit or be interested!

By leaving Your name and email in the box below You get notification of futures posts and news!

Peace // Claes

Mattresses

Oh yeah, this seems like an easy one, right? Just something to lie on, nothing special at all…
Well, there still are some decisions to make…
Mattresses basically come in two varieties, static and inflatable.

Remember the greyish roll of styropor mattress from the 80:s? They haven’t developed that much since, upside is they definitely kept there sturdiness. You just can’t break them by normal use, only remember to keep them out of the fire…
Downside: not very (or, to be frank, the least) comfortable

So, God bless Thermarest, giving us one of the first mainstream “self inflating”
mattresses some 20 years ago. Of course there’s nothing like a truly self inflating mattress, the foam filling somehow remembered its former volume and sucked some air into the device making the final filling with air so much easier.
Thankfully we’ve had quite some development here and today you can chose from a variety of different producers and models.
That mentioned you could probably find a pretty decent used car for the price of a high end mattress, filled with down, almost 4 inches thick and inflated by a built in pump, providing a level of comfort that is unchallenged by your bed at home. At the same time weighting down your backpack with 2kg (a good 4 lbs) or more. While at the other hand getting away from that bed at home might kinda be one reason for this whole hiking adventure.

In the case you intend to go hiking in polar conditions, or are extremely sensitive to cold climates, I’d definitely recommend a down filled mattress 7cm (roughly 2/5 inch) or thicker. For a summer hike while camping on soft ground a traditional static camping mat might be sufficient, leaving you huge budget space for other extravagances.

It all boils down to the same old questions to ask ourselves:
Where, when and how is the equipment to be used?

And then we chose the most appropriate option!

Please leave a comment below to let me know if this was helpful or if you have questions!

By leaving Your name and email in the box below You get notification of futures posts and news!

Good luck, have fun and love the experience!!!

Peace // Claes

Stoves


Meals and hot drinks are always highlights of any tour and we need a stove to prepare them.
There are countless different stoves available in the market, yet the wood fired ones are really only workable in forest areas and often too large and heavy to carry on a hike.
Therefore I limit this article to the three types of stoves normally used for hiking:
  1. Spirit
  2. Gas (picture shows my gas stove from Primus)
  3. Multifuel
 Let me give You some details:
  1. Spirit stoves are fueled almost 100% pure, denatured spirit. The advantages are that spirit is easily available and affordable in most places and burns well even in colder conditions. The downsides are mainly pretty low heat and therefore quite time consuming cooking. Some spirits leave a lot of soot on the bottom of the pot which then easily stains other equipment unless properly cleaned and stored separately. There’s also a risk of spilling fuel into the meal, just one drop ruins everything… And putting out the flame can be an adventurous endeavor. I used a few different ones for many years and they are very reliable when operated correctly.
  2. Gas stoves are easy, clean, safe and fast to use and modern stoves often utilizes special heat absorbing and concentration designs to cut the cooking time considerably. Personally I moved over to the use of gas quite a few years ago and never looked back except with winter hikes. When temperatures hit close to 0 centigrade (lower 30’s F) the pressure in the cartridge decreases to a point where the cooking time is painfully prolonged. As long as were operating in non frozen environments in regions where the cartridges can be easily obtained I definitely recommend gas stoves.
  3.  Multifuel stoves use different exchangeable valves to enable the use of several fuel sources. The most common one is chemical grade gasoline, yet they can be fueled with gasoline from any filling station, strong enough alcohol, kerosene etc. Slightly more complicated to use than a gas stove and clearly less potentially messy than spirit burners they are a great choice for colder climates and all year use in moderate ones!
Good luck, have fun and love the experience!!!
Please leave a comment to tell me what You think and share this with friends and loved ones who might benefit or be interested!

By leaving Your name and email in the box below You get notification of futures posts and news!

Peace // Claes

Sleeping Bags

Next to food this might be the most important item for a pleasant hiking tour and you should really invest some thought and money into your sleeping bag.
For my part I own three of them for use at different temperature ranges, most people neither want nor need to invest in several sleeping bags, just make sure you think it through thoroughly when and how you want to use it and chose a bag that is sufficient for a lower temperature than you plan to use it for. There are few things worse than being cold when trying to sleep after a days hike, while at the same time we can take on a lot of challenges during the day as long as we know we are dry and warm when going to sleep at night.
That said lets get into some details. Though there´s a myriad of different producers of sleeping bags and even more different models it all basically boils down to two main versions when it comes to filling material:
  • down – that is lighter, warmer and more easy to compress to a smaller size but at the same time considerably pricier and looses its benefits substantially when wet
  • synthetic fiber – to match the temperature range of a down bag it takes more space and weights more while at the same time being more affordable and keeps warmer when moist or wet
I personally prefer down because in my experience the upsides are immense due to my preference for longer hikes. If You primarily are looking for 2-5 day hikes when size and weight matter less, a good synthetic bag will definitely serve You just as well. Especially if You hike in moister regions in which case You might even consider a water resistant bag even considering the increased weight.
Just remember that the quotient between price and quality is very much at work here and I really recommend to hit a sale or outlet to find better quality at a lower price, if You can afford to wait with Your purchase. As previously mentioned the more high end sleeping bags can be almost ridiculously pricy so finding them at a bargain is worth quite a lot for any budget.
Make sure, though, that You find a bag that really fits You body size as both too short a bag as one that leaves a lot of room at the feet will impact Your comfort and temperature negatively.
Good luck, have fun and love the experience!!!

Please leave a comment to tell me what You think and share this with friends and loved ones who might benefit or be interested!

By leaving Your name and email in the box below You get notification of futures posts and news!

Peace // Claes

Boots & Shoes

Probably the most important choice for a successful and pleasant hike is which shoes to wear. As much as taste and personal preference plays in there are a few things to consider.

We will here discuss different types of shoes and when to use which.
  1. Shoes v/s Boots – naturally boots are the best choice in wet and muddy conditions, when we face an abundance of shallow streams we need to cross and in rocky terrain where the extra support for feet and ancles is needed. Other than that we can roll by the rule of thumb that “the lighter the shoe, the faster the hike”. It just seems to be so much easier to move in light shoes than heavy boots!
  2. Leather v/s membranes – here we find ourselves completely in the realm of personal preference, some people swear on GoreTex while other swear at it. Basically the membrane shoe takes less work to keep you dry initially yet doesn’t even come close to the durability of a well maintained leather boot. The membrane tends to get clogged after some time leaving us with a shoe that doesn’t breath at all any more. On the other hand the repeated wear and tear of folding at the same spot every step we take tends to make it break and now the shoe has a leak. Plain leather shoes need more work greasing and waxing to keep them water resistant, on the other hand they can last for years to come if they’re properly taken care of. I’ve tried both and finally went back to plain leather after 8 years of membrane trouble. So, if you’re willing to put some work into your footwear and carry a small can of wax and/or grease I’d clearly recommend to ditch the membranes, they’re just not worth the downsides.
  3. Stability – as mentioned above the nature of the activity demand different sturdiness of boots. The soft shoes used for easy conditions left aside there are four different categories of hiking boots – A,B,C and D, A being most lightweight and soft, D very stable and used more or less exclusively with crampons and other special equipment. To cover most hiking areas I’d recommend a pair in the B/C category, enabling the use of crampons while still smooth enough for comfortable hiking under easier conditions and serving as winter boots in moderate climates.
Now, if you’ve been following me for some time you probably know about my love fore minimalistic barefoot shoes and, frankly, I’m using these as often as I can in my everyday life and on hikes. Just recently I found a pair of VivoBarefoot boots and tried them on for a weekend hike. They totally exceeded my expectations and I can not recommend them enough for easier trails and moderate packs.
For a full review of the shoe, click here!
Well, that’s about it – remember there’s no shoe that fits everyone and make sure that you really try your new ones out thoroughly. Being out in the wild and finding out that you have a bad fit and end up with blisters is a bad idea!
Good luck, have fun and love the experience!!!

Backpacks

Alright, let me put one thing straight here: Size matters!!!
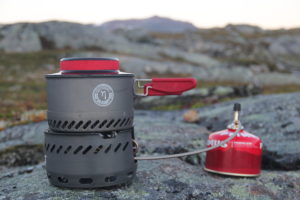
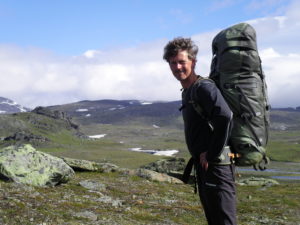
At least when it comes to backpacks. Chose a small one and you’ll have all sorts of equipment strapped to the pack and get caught up in branches etc, chose a big one and you be prone to pack a bunch of stuff you don’t really need and have to carry that stuff around. The obvious solution is to have several different bags for hiking trips of different lengths though a minute personal discipline when packing does the trick just as well.
Most important question to ask when choosing what to bring on a trip: do I really need this item badly enough to carry it around?
Remember that everything you pack you also need to carry, the general recommendation is to never carry more than 30% of your body weight an actually I’d like to reduce that down to 25% if you want a more pleasant hiking experience. For a solo hiker this can prove a real challenge, especially if you want to stay out in the wild for two weeks or more, so plan wisely and, once you decided to make hiking an important part of your life, get good light weight gear. In this case you really benefit from going for high quality!
In my experience a 70l pack is sufficient even for several weeks long hikes, I usually manage to keep all my necessary gear inside the pack and the limited size still prevents me from bringing too many unnecessary items. Most people just pack to much stuff ‘I’m case they need it’ and that just makes the hike harder. Believe me, everything takes longer and you will probably not have hours to read books anyway. So why carry them on your back?
I provide a list of equipment you need for safe and resenable comfortable hiking and I recommend you get the best (and lightest) products your budget allows in each category. Then comes the food you need depending on duration, nature and intensity of the planned hike (always pack a few portions extra, it’s a lot better to bring back some than to run out…) and now you can add whatever you like to bring as long as it leaves you within you weight limit.
Sorry for being repetitive, just remember no one is going to carry your stuff for you (if you’re not extremely lucky)
This is not the place to get into the smaller pack, like the ones you use for day hikes or to carry your stuff to the beach, simply because you’ll never hit a weight issue with these loads.
So let’s focus on backpacks for hiking anything from a long weekend (4-5 days) to several weeks, and now it becomes crusially important to be comfortable with your pack. Basically it’s going to be closer to you than your significant other during your time in the wilderness so better make sure you develop a great relationship!
Now, one question I get all the time is which backpack is the best, and, unfortunately, my answer is always the same… It depends…
Everyone of us is different and has different needs so let me walk you through some basics and then we’ll get into how you can find a pack that’s right for you.
Slightly simplified there are two basic types of backpacks (the third, frameless type just doesn’t do the trick when the load exceeds about 12kg (26lbs) and that’s enough said about them):
  1. Exterior frame – the go-to backpack for carrying really heavy loads, yet rather large and inflexible and just not necessary for most of us (frankly I’ve not used one in 25 years)
  2. Internal frame – a much softer pack that is easier to handle and does a great job up to 25-30kg (55-65lbs) depending on the model
For alround purposes I’d aim for a 65-75l pack with an internal frame, the smaller one if you’ll seldom or never go out for more than a week at a time!
Depending in when and where you are planning to predominantly use the pack determines if you need a waterproof one (considerably more pricy) or if a separate rain cover will do. Also there are great varieties in fabric quality, as a rule of thumb one can say that the sturdier the material, the heavier the bag. Only you can determine how tough your gear has to be to fit your needs!

The most important thing is to get one that fits your back comfortably enough to be carried for hours every day for a number of consecutive days and there’s no way to know that just from looking or trying it on in the store.

Most serious suppliers will let you try it out for some time and bring it back (careful here, it needs to be in impeckeble condition) if you don’t like it, and this goes for many online stores as well. Now, obviously you cannot take it for a hike to test it out for real, that would render it used…

Yet loading it with 15, 18 or even 20kg (33, 40 or 44lbs) and carry it around inside for a weekend while going about your days would give you a pretty good feel for the equipment and how it fits your frame.

Frankly, if they don’t let you try it after purchase but tell you to decide in the store, I’d recommend you take your money somewhere else!
I hope this article is helpful to you in choosing your equipment, please leave a comment and let me know, ok?

Thank You so much for checking out my blog, please share this with friends and loved ones who might benefit or be interested!

By leaving Your name and email in the box below You get notification of futures posts and news!

Peace // Claes